
How Does Resin 3D Printing Work? The Mechanism Explained

Introduction
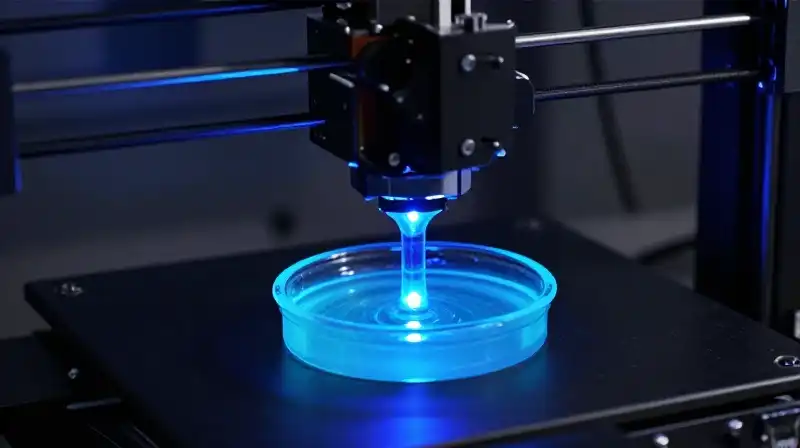
Resin 3D printing is an additive manufacturing process that transforms liquid photopolymer resin into a solid, three-dimensional object through precise light exposure. Unlike traditional filament-based printing (FDM) which melts pre-formed plastic molecules, resin printing relies on a chemical reaction where small molecules are chemically bonded by light energy. The entire process occurs layer by layer. Each horizontal “slice” of the object is cured from the bottom up (or top down, depending on the printer design) as light causes the liquid resin—which contains specialized chemical building blocks like acrylates and a light-sensitive catalyst—to instantly solidify into a tough, rigid polymer. The fundamental mechanism of a resin printer is the controlled application of ultraviolet (UV) light, usually around 405 nm, which triggers the molecular cross-linking of the liquid resin. Once this cross-linking is complete, the liquid is converted into a hard solid. The specific way this light is delivered determines the printer’s type and speed.
How the Curing Mechanism Works Chemically
The transformation from liquid to solid is a photochemical reaction. The liquid resin used in this technology is not just plastic; it is a complex mixture designed to respond predictably to specific wavelengths of light.
The Role of Photopolymers
Resin materials contain acrylates, which are a type of monomer (a small building block). When mixed with a photoinitiator (a light-sensitive molecule), they form a photopolymer. When the specific UV light hits this material, the photoinitiator absorbs the energy and triggers the formation of free radicals. These radicals then initiate a process called polymerization, linking the acrylates together into long, cross-linked chains. This process hardens the resin almost instantaneously, turning a viscous liquid into a solid, structural component.
The Light Sources: SLA, DLP, and MSLA
While the chemistry remains consistent across resin printers, the method used to deliver the UV light varies significantly, affecting print speed and resolution:
- Stereolithography (SLA): This is the original method. It uses a highly focused UV laser that scans the surface of the resin vat to cure a precise pattern for each thin layer. Because the laser moves point-by-point, traditional SLA can be time-intensive but offers extremely high precision.
- Digital Light Processing (DLP): DLP printers operate similarly to a high-resolution projector. Instead of a moving laser, they use a digital light engine (a screen of thousands of micro-mirrors or pixels) to project the entire cross-section of the part simultaneously. This “one-shot” layer curing capability makes DLP significantly faster than older laser systems.
- Masked Stereolithography (MSLA): This method, commonly used by hobbyists, combines the speed of the digital projection method with a standard LCD screen. An array of 405 nm LEDs shines through the LCD, which acts as a digital mask, allowing the entire layer to cure rapidly. MSLA is currently the most common and fast type in the market.
The Complete Resin 3D Printing Process Explained
Understanding “how does a resin 3D printing work” requires looking at the end-to-end workflow, not just the light-curing phase. The process is highly sensitive and involves specific steps to ensure success and safety.
Phase 1: Preparation and Slicing
The 3D model, typically a .STL file, is loaded into specialized software. The software slices this complex geometry into hundreds or thousands of thin horizontal layers (slices). Before printing, the operator must:
- Select the appropriate resin type based on the material goal (e.g., flexible, durable, or castable).
- Calibrate the printer’s light exposure (the “exposure time”) to ensure the resin hardens completely at the specified thickness.
- Apply digital supports: Just as FDM printers require support structures, resin prints often need temporary supports to prevent the delicate, solid layers from detaching prematurely from the build platform during the curing process.
Phase 2: Printing and Curing
Once the process begins, the print head (or projector) lowers into the resin vat. The UV light is applied to the bottom of the resin layer, curing the pattern in the specific area of the part and adhering it to the platform. The platform then moves vertically, adding a new layer of liquid resin on top of the newly solidified layer, repeating the curing and lowering sequence until the entire object is built.
Phase 3: Post-Processing (Cleaning and Final Curing)
This phase is essential and differs drastically from other 3D printing technologies. When the print is finished, the object is still sticky and coated in uncured liquid resin.
- Washing: The part must be thoroughly washed in a specialized wash containing isopropyl alcohol or soap. This removes all excess uncured liquid resin from the surface and internal crevices.
- Final Curing: Even after washing, the surface layer requires maximum hardness. The part is placed in a dedicated UV post-curing chamber. This second period of light exposure triggers the final chemical cross-linking, ensuring the part achieves its ultimate strength and durability.
Resin vs. FDM: Deciding Which Technology is Right
A key difference between resin printing and conventional Fused Deposition Modeling (FDM) relates to how the material achieves its structure. FDM extrudes and melts pre-existing plastic filaments; resin printing chemically “build” the structure atom by atom. | Feature | Resin 3D Printing (SLA/DLP) | FDM 3D Printing | | :--- | :--- | :--- | | **Material Structure** | Chemically linked monomers (liquid to solid) | Melt and solidify pre-formed polymers (filament) | | **Surface Finish** | Ultra-smooth and highly detailed | Visible layer lines (stair-stepping) | | **Layer Thickness** | Very fine (often 0.01–0.05 mm) | Generally coarser (0.1–0.3 mm) | | **Ideal Use** | Models, miniatures, jewelry, high-res prototypes | Functional prototypes, large components, rugged parts |
Safety and Practical Considerations
Because resin printing involves handling chemicals and solvents, safety and quality management are critical factors.
Handling and Safety Protocols
The resin is a chemical compound. It can be toxic, especially if it contacts skin or is inhaled. Proper handling requires:
- Wearing nitrile gloves and safety goggles.
- Working in a well-ventilated area.
- Ensuring all waste resin is disposed of according to local chemical and hazardous waste regulations.
Material Selection and Print Parameters
The performance of a print depends entirely on the resin selected and the printer settings. Different resins are formulated for different purposes:
- Standard/General Resins: Offer a balance of detail and strength for most prototyping.
- Tough/Durable Resins: Designed to withstand impact, often used for functional parts.
- Biocompatible Resins: Used for medical applications, ensuring they meet specific safety standards.
- Castable Resins: Designed to burn away completely during casting, ideal for lost-wax jewelry manufacturing.
Always match the resin’s data sheet to the specific exposure time and temperature required by your chosen 3D printer model.
Practical Summary of Resin Printing
Resin 3D printing is an elegant system rooted in chemistry: UV light triggers the molecular cross-linking of liquid photopolymer resin to construct objects layer by layer. Whether using a high-speed DLP projector or a fine-tuned laser (SLA), the core process is defined by chemical solidification. Success, however, depends as much on meticulously preparing the model, controlling the exposure settings, and—most importantly—completing the critical post-processing steps of washing and UV hardening. By understanding this chemical mechanism, users can move beyond basic printing and utilize this technology for complex, highly detailed manufacturing applications.
Frequently Asked Questions
How does 3D printing work resin?
Resin 3D printing transforms liquid photopolymer resin into a solid object by applying precise UV light exposure. This light energy triggers a chemical reaction where monomers are cross-linked into long chains, instantly solidifying the viscous liquid into a rigid polymer layer by layer.
How to 3D Print with Resin
Prepare the Model and Slices
Load the 3D model into specialized software and slice the complex geometry into thin horizontal layers (slices).
Configure Print Parameters
Select the appropriate resin type, calibrate the printer's light exposure (exposure time), and apply necessary digital supports to the print.
Start the Printing Process
Lower the print head or projector into the resin vat to begin the curing cycle.
Cure and Layer
Apply UV light to cure the pattern, adhere it to the platform, and repeat the process as the platform moves vertically, adding successive layers until the entire object is built.
Wash the Finished Part
Once the print is finished, thoroughly wash the part in a specialized wash containing isopropyl alcohol or soap to remove all excess uncured liquid resin.
Perform Final Curing
Place the washed part in a dedicated UV post-curing chamber for a final period of light exposure to achieve ultimate strength and durability through final chemical cross-linking.
Related Articles